Monday, 7 September 2015

Natural Drugstore Makeup for College


Can you even believe it's the end of Summer?? I'm sat here in denial that I have to go back to college this week. A part of my brain keeps saying 'nah it's still the holidays, college can't really begin in the morning' and I'm desperately hoping it's right, even though I know it's not. One can dream, right? But as I'm sure no one is prepared to wake up at the crack of dawn to get ready for the day, I thought I'd share a makeup look that helps me to actually look bright and awake at 8am (even though I'll be ready to fall asleep at any point during the morning).

I always start my makeup with a primer because otherwise I get to the end of the day my makeup is gone - I have no idea what my skin does to it. So I like to apply The Body Shop Insta Blur Primer to my face, concentrating on my t-zone. It has a really odd texture, I honestly don't know how to describe it, but when you smooth it onto the skin, it does feel like its blurring out imperfections and pores.
Onto the base, The Body Shop BB Cream is a nice light dewy coverage and for me, adds a little bit of warmth. When I'm a bit paler, maybe too much warmth, but nothing a good blend down the neck won't fix! As for my blemishes, the Bourjois Healthy Mix Concealer isn't to shabby when it comes to hiding my spots. It has a really nice coverage with a yellow undertone, so its pretty good at cancelling out any redness.
 To set everything in place, I love to use the Bourjois Healthy Balance Powder, and I mean love. It's finely milled so mattifies the face, but it still leaves a natural shine behind. Since my Giorgio Armani Luminous Silk Powder smashed and left a round powder shaped hole in my heart, this has been nicely filling the space. If you thought the Rimmel Stay Matte Powder was a tad too heavy and too mattifying - try this!

Brow-wise, I usually reach for the Rimmel Brow This Way Eyebrow Gel or the Soap & Glory Brow Archery Eyebrow Pencil, depending on how bold and defined I want them to look. But as I have quite fair, sparse brows, I prefer using the pencil with short, light strokes to make my eyebrows appear fuller. I rate the pencil a lot more than the gel, the gel slightly crumbles a bit towards the end of the day and the wand picks up too much product, which might not be an issue to a lot of people, but I like things to be easy and low maintenance.

The Max Factor Excess Shimmer Creme Eye Shadow: 20 Copper was a recent purchase but a damn good one! It has a whipped creamy texture that looks like a light, shimmery rose-champagne colour when applied. It blends incredibly easily and looks naturally beautiful on the lids, Max Factor definitely have it down with their creme eye shadow formulas.
After a quick curl of the eyelashes, I put one or two coats of the Maxfactor False Lash Effect Mascara on my top eyelashes, sometimes on my bottom eyelashes; depends how I'm feeling that morning.

To add colour back to my face, I sweep the Sleek Blush: Rose Gold onto the apples of my cheeks. I always forget about this blush, probably due to the black packaging. But then once I remember it, I love it and can't put it down. Last week I found this blush again and now I love it just as much as I did before. It's a beautiful rosy pink shade with gold flecks running through it. I would recommend a quick tap after loading up the brush to get rid of any excess product as it can be a bit strong applied straight. But it kinda acts as a blush-highlighter in one, and for rushed mornings 2 in 1's are my best friend.

This makeup looks really pretty finished off with a soft pink lip, the Rimmel London Moisture Renew Lipstick: 705 Lets Get Naked is a lovely natural pink shade, and for this look I think applying it from the bullet, then blending it with your finger gives a nice subtle effect. If it doesn't feel particularly windy outside I might opt for a pink lip gloss instead, taking precaution against the ol' hair blown and stuck in lip gloss difficulty. Sometimes it's worth the risk.

Monday, 31 August 2015

The First Development

Taking photography at A-level has really spurred on my passion for cameras and photography; it got me particularly interested in the world of film cameras. So a few months back, I took the train into Leeds and purchased a second hand film camera and a 24 exposure film. 


24 pictures later and I'm still getting to grips with it! Some photos turned out really well and others... not so well. But this was mostly a test run to see what the camera was like and which conditions it worked best in. I love the outcome though, the natural vintage filter on the photos is so beautiful. It's a real long shot but eventually I want to be able to develop photos in my own dark room, maybe one day!

The camera I use is the Pentax ME Super, and in these photos I used either the Soligor Wide-Auto 28mm F2.8 lens or the Cosina Cosinon Auto 50mm F1.7 lens, all on the Fuji Film Superia X-tra 400.
The photos below are a few of my favourites from the roll.


Friday, 31 October 2014

American Horror Story Coven Inspired Halloween Look


I am a massive fan of the tv show American Horror Story, the new season has already started and I get embarrassingly excited for the new episode each week, I would really recommend watching it if you don't already! And as I was actually invited to a Halloween party this year, I knew pretty much straight away I wanted to go as a character from AHS. Picking which season to base my costume off was pretty hard, but I decided to choose the third series, Coven, because it is centered around witches and that is very typically halloweeny.

THE MAKEUP
My makeup was inspired by the character Madison Montgomory who is a teen film star, so as you can imagine she is very glamorous and her makeup is always on point.


BASE
> Inglot Under Makeup Base Primer
> Nars Sheer Glow Foundation mixed with Mac Pro Longwear Foundation
> Mac Studio Finish Concealer, on any redness, blemishes or dark circles
> Bourjois Healthy Balance Powder
> Illamasqua Hollow Creme Pigment, as a contour under the cheekbones, around the side of the face and under the jaw
> Illamasqua Naked Rose Blush, lightly on the apples of the cheeks and along the cheekbones


EYES&EYEBROWS
> Mac Mystery Eyeshadow, through the brows
> Mua Undressed Eyeshadow Palette and Naked 2 Eyeshadow palette, 1&2 mixed all over the lid, 3&4 mixed and blended through the crease focusing on the outer corner and along the lower lash line, a small amount of 5 lightly blended through the outer corner of the crease and along the outer corners of the upper and lower lash line
> Bourjois Kohl&Contour Black Eye Pencil and Mac Coffee Eye Pencil, slightly smudged along the outer corners of the upper and lower lash line
> Max Factor False Lash Effect Mascara


LIPS
>Maybelline Pink Brown Lipstick, lightly all over the lips
>Sephora 6 Lipgloss, dotted over the top
>Tanya Burr Smile Dream Sparkle Lipgloss, lighly dotted on the top to finish


THE OUTFIT
For the outfit, I was mostly inspired by the character Zoe Benson, particularly in this picture where Fiona takes the girls out on a field trip (Fourth from the left).


Sticking to my usual habit of being last minute, I picked up my whole outfit on the day of the Halloween party.. typical me. So, it's actually all from Topshop because I just couldn't find what I was looking for anywhere else.

Hat £28
Dress £7 (sale)
Shoes £62

Of course the hat was very important, and I did have my eye on this one for a while but the price tag is quite expensive, especially for a hat. But I'm glad I finally managed to part with my cash because I actually love it, a lot, and I think it's perfect for this look. As for the dress, I wanted something quite long and floaty, and it was an absolute miracle to find this dress hung over (yes actually hung over) the sale rale, I had to really yank it off to get it but it was totally worth nearly breaking the stand to see if it was my size, because it was the only size 8 left! I usually wouldn't have been so manic about it, but our parking was near expiring and up until that point I still hadn't found a dress. But I think this one is perfect and for £7 its a total bargin! Now, I'm very guilty of being an impulsive buyer and these shoes were a complete impulse buy, a naughty impulse buy to be honest because they were quite expensive. But I just couldn't leave them on the shelf, especially because they're so perfect for this witch look, in my head they are what I think a modern day witch like in coven would wear. And they are leather, so they will last me a good while, so well worth the money in my opinion.

Hope you have a good Halloween!

Thursday, 17 July 2014

How I Clean My Make Up Brushes


Cleaning my make up brushes is a task that I tend to put off doing, even though it's one of those things that really shouldn't be pushed to the bottom of the 'To Do' list. For me it's a lot of effort and it can be slightly inconvenient as I don't have many brushes but I use them all daily and after deep cleaning, the brushes need a day or two to dry, so it's hard to find a time to wash them when I won't be needing to use them the next day. Although it's something that has to be done as leaving them unwashed allows old make up, dirt, oils and bacteria to build up in the bristles, so continuously using them without giving them a good clean spreads the dirt around your face which lead to breakouts (which I don't think anybody's a fan of!).

I usually spot clean my brushes using the MAC Brush Cleanser from a daily to weekly basis depending on how often I use the brushes that week or which brush it is. I tend to spot clean my eye and foundation brushes on more of a daily basis because I find they get the most dirty. However I deep clean all my brushes around every two to three weeks, even though I should probably do it more frequently I am just very lazy. 


For deep cleaning I use Johnson's Baby Shampoo which I really like as it leaves my brushes soft and clean, it was also recommended to me by a make up artist so it must be alright! Other alternatives to mild shampoos are brush cleaners or hand soaps, these are gentle so won't damage the bristles.

This is the routine I stick to:


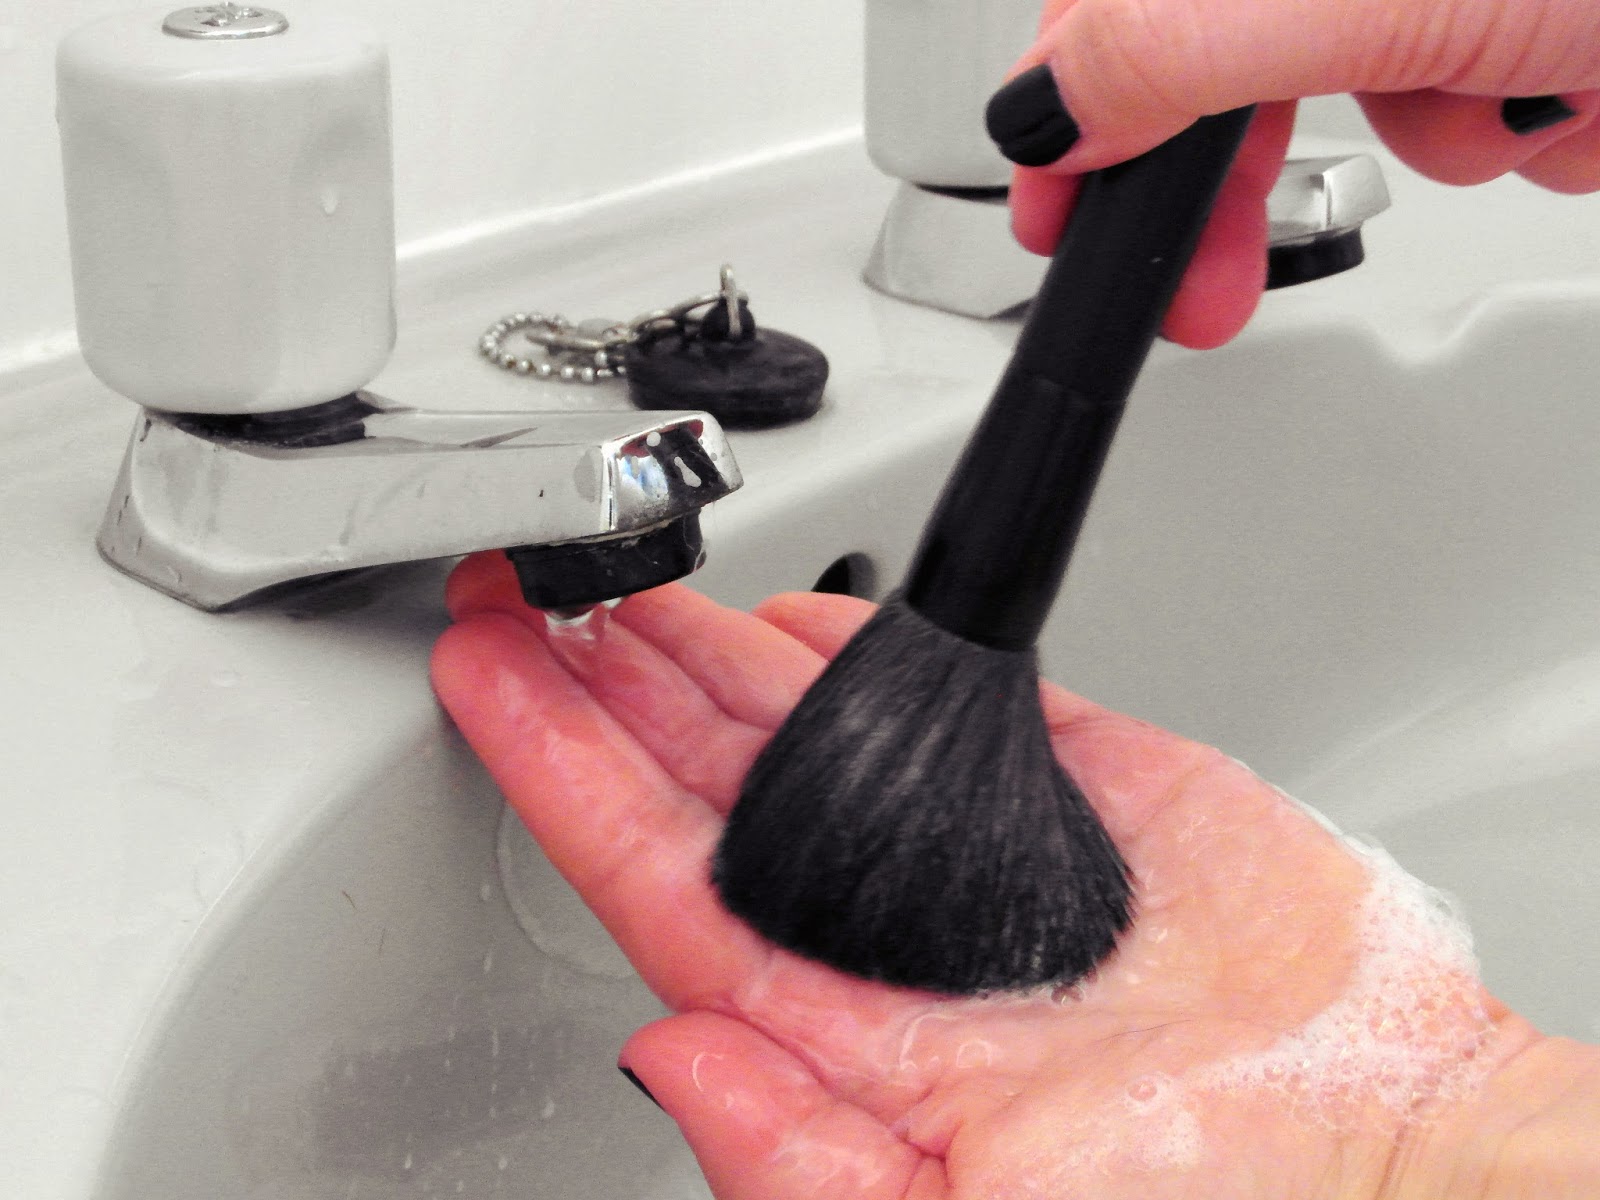
Run warm water over the bristles with the brush facing downwards to make sure the water doesn't run into the ferrule.


Put a little bit of shampoo/hand soap/cleaner into your hand and swirl the brush around to lather up the product.


Then swirl and lather the brush in the product again but this time under the warm water.
Keep repeating until there is no make up left on the brush.


Rinse the brush under the water to make sure there is no product left in the brush and gently squeeze out excess water.


Shape the brush into it's original shape and leave it to dry.


I leave my brushes to dry either lying down on a towel or placing them with the bristles over the edge of a surface to help the brushes keep their shape. Although I never dry them with the bristles facing upwards, as it can cause the water to run down into the ferrule and eventually dissolve the glue holding the bristles together. Brushes can be so expensive and after I've invested in one I really don't want it to be ruined within a few years.

Hope this was slightly helpful!


Friday, 13 June 2014

Currently Loving in June


Hello! Sorry for the lack of posts recently, it's been pretty hectic with exams and school but after next week I should be back on track with posts because I have my last exam on Wednesday! Yay! 
I have a lot of posts planned for summer (I have been very organised and written them all down in a notebook) and I'm going to try upload on a weekly basis, so I'm super excited. 
Anyway enough with the rambling, on to what I have really been loving recently!


MUA Pressed Powder, Shade 4
I got this powder fairly recently from Superdrug after hearing that the darkest shade, which is the one I got, is a perfect contour colour for slighty fairer skins, and I completely agree with that. It's not muddy or overly bronzey due to its original job being a  powder, so it doesn't have a real orange undertone to it because it's meant to suit the skin. I'd say it's more of a light caramel colour. I think I'm starting to prefer it to my other bronzers which I use for contouring because I find this gives a lovely definition to the face which is natural and subtle, especially since it's matte. Also the massive benefit to this powder is the price, it is literally only one pound which is so amazing for what it is.


Giorgio Armani Blushing Fabric, 3
I have had this blush for quite a while but I had totally forgotten about it until I was looking through my drawer trying to find a brighter blush for Summer, and this one is perfect. It gives a bright but natural pink blush to the cheeks, and it can be built up to give a stronger more vibrant colour. I find that it also blends really well and is very lightweight due to it being water based which I like a lot because it's not thick like most creme products. I'm super excited to wear it during the remaining Summer months, I don't plan on wearing a lot of makeup so I think it will be perfect for a fresh, light makeup look.


Above - Giorgio Armani Blushing Fabric, 3 
Below - MUA Pressed Powder, Shade 4


Collection Illuminating Touch Concealer, Natural 2
As my sleeping pattern is pretty messed up and I do tend to stay up quite late, I'm prone to getting quite bad under eye circles so I really wanted to get an under eye brightening concealer. I chose to give this one from Collection a go, mostly because I'd tried the lasting perfection concealer and loved it, and I was not let down. As soon as I applied this, it instantly brightened up my under eyes and made me look awake. It has a slightly thick and creamy formula which blends well and gives a good coverage, without it looking heavy under the eyes. I have been using it religiously every day since I got it and has saved me from looking so tired and drab on a morning.


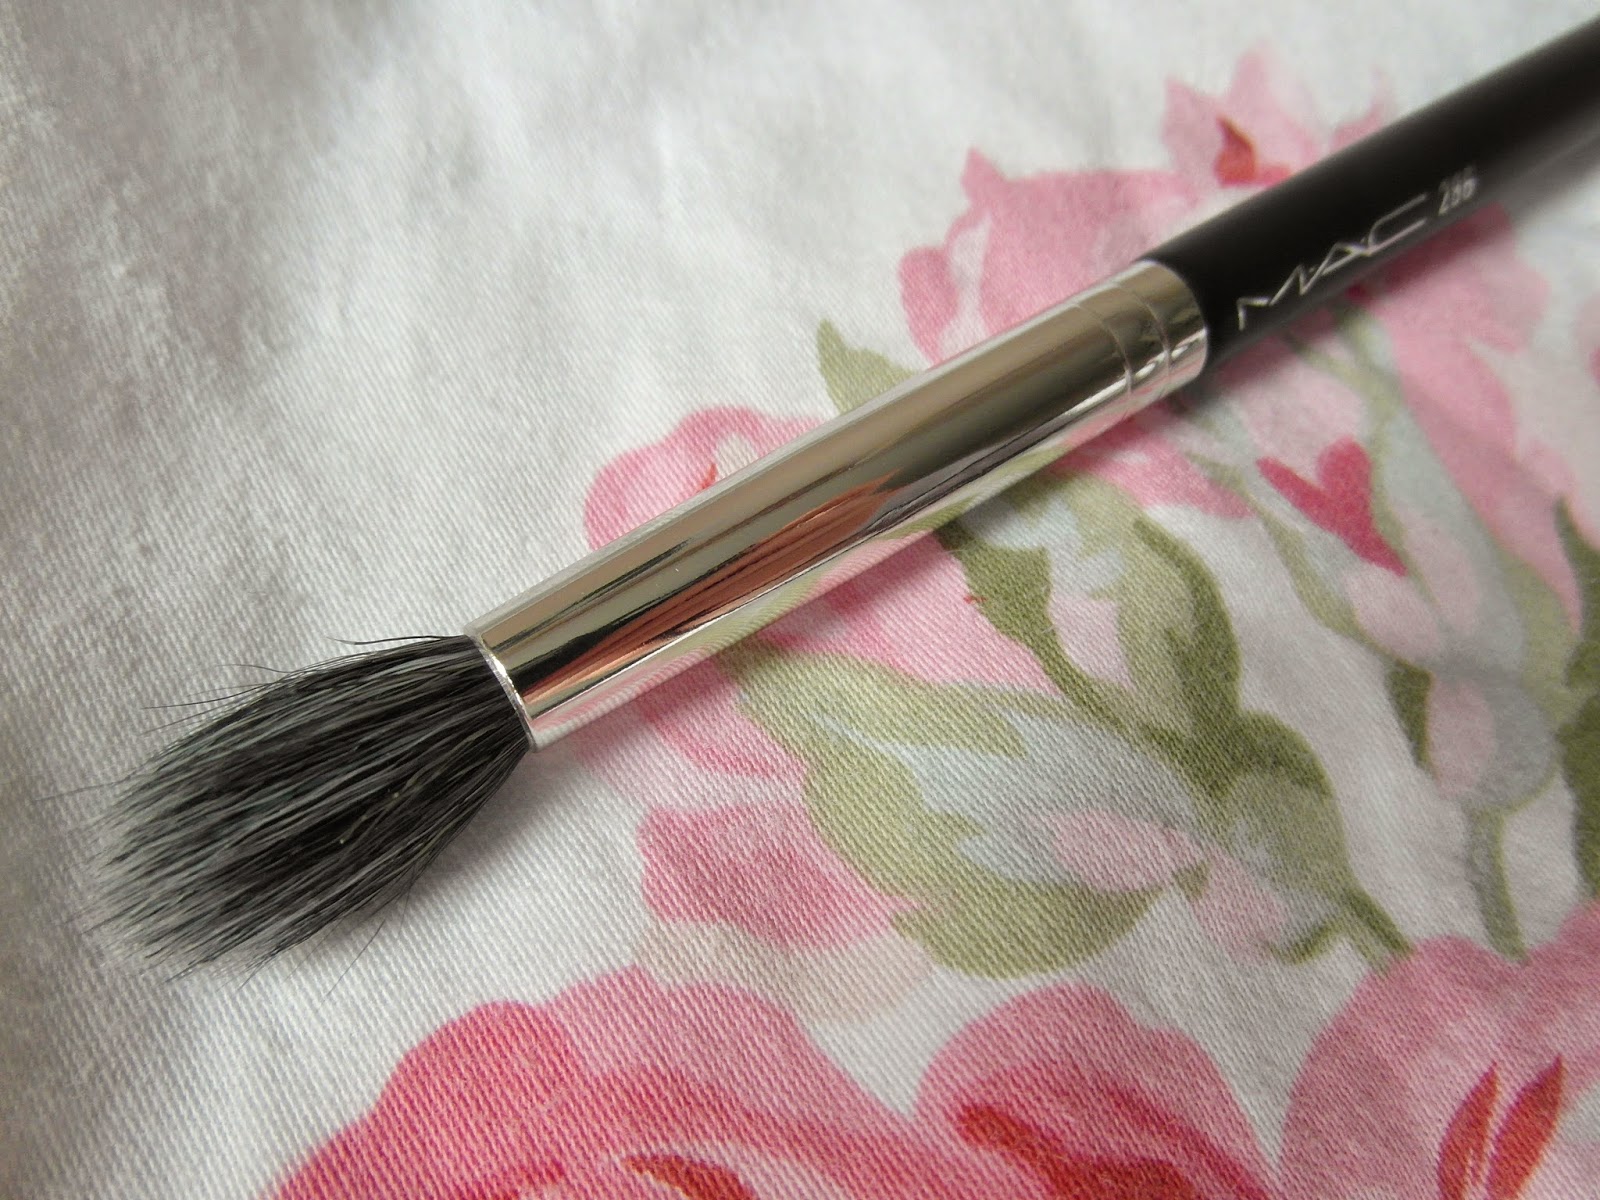
MAC 286 Brush
Speaking of concealer, I have enjoyed using this brush to blend it in, even though its real job is for eye shadow, I do love it for concealer. It's a perfect shape and density for blending around the eyes and for getting the odd small spots and blemishes on the face. I also really like that the bristles are duo-fibre because they are incredibly soft so they don't feel scratchy at all, and it makes the brush a whole lot easier to clean.

Wednesday, 30 April 2014

Inglot Freedom System Palette


One thing I was not expecting to see when I walked into a perfumery on one of the harbors in Lanzarote, was an Inglot counter. I had to double check I was reading the name right. In most of the perfumeries there are only the main big brands like Chanel, Dior, YSL, LancĂ´me and Clinique so I honestly couldn't believe this one stocked Inglot.

I have heard many things about their products from other beauty bloggers, but they always said they purchased theirs from America or London, usually in IMATS, and since I'm not visiting either of those places any time soon, I had just accepted it was going to be quite a while before I could try any of their products.

So naturally when I did see their counter I got very excited, probably too excited, and decided to make my own Freedom System palette.


I chose the five square palette and filled it with two matte shades and three shimmery/pearl shades. I knew I wanted two matte shades so I could use one as an all over wash for if I'm doing a simple eyeliner look, and one as a light crease colour and I think the two I've chosen do that very well. The 337 is more of a peachy nude and the 360 is a normal light brown but it gives a subtle definition to the crease which I like.
Then the other three colours I picked just because I liked them. I didn't own any eye shadows which had more of a purple/pink tone to them so I was aiming towards those shades but I still ended up coming out with a champagne gold colour. It's such a staple shade though because it's wearable during the day and at night and it blends easily with lots of colours, so how could I not?! But I think my favourite is 452 on the far right. I wore it for a meal out whilst I was away and it looked so pretty because the colour wasn't too much but it still looked smokey enough for an evening.

I am already in love with this palette, the colours are very pigmented and blend so easily, which is great for me because I really can't blend eye shadows. I would even say they are quite comparable to M.A.C eye shadows, but Inglot's work out a lot cheaper. I've actually heard that 423 is a dupe for satin taupe which is a colour I've been wanting to get from M.A.C for a while.

Friday, 4 April 2014

Fall Out Boy Concert!


Back in march I went to a Fall Out Boy concert with my friend Izzy and it was absolutely incredible. We had to travel quite a way because the venue was in Newcastle and we live near Leeds, but when it's one of your favourite bands what does distance matter, right? The time flew by anyway so it didn't even feel like two hours which was good.

We took a few quick pictures before the concert!


We arrived just as the doors were opening so we went inside pretty much straight away, of course we immediately found the merch stand. I only got a crew neck jumper, I desperately wanted to buy more but I was a little short on cash. Looking back, this was probably a good thing because I would have bought everything if I had the money with me.

Supporting Fall Out Boy were The Pretty Reckless, who were so amazing live I can't even begin to explain how good they were! And New Politics, however apparently something happened with their van so they couldn't make it. It was a little weird when I heard they should have been supporting because I also saw them in November when they were supporting Panic! At The Disco, so I had a slight deja vu moment!

Then Fall Out Boy came on, I got super excited so didn't take many photos, but here are a few of the ones I took that came out okay.


We were also really pleased with the set list they chose, they did songs from their new album and ones from their old albums including the old classics which are well known by everyone. I still can't get over how good they were, it was such an amazing evening.